How to Make a Car Body with Autodesk 123D Make
1. Carbon Quattro 2. Carbon Skyline If you think carbon fiber is cool, then you must think carbon fiber-bodied cars are even cooler. I found a couple of cars at the 2021 SEMA Show in Las Vegas, Nevada that used carbon fiber on their carbon fiber, so you can carbon while you fiber. Or something like that.

How to Make a Car Body with Autodesk 123D Make
Designing a car body doesn't mean going overboard in the field of fantasy and creating a Buck Rogers spectacle designed to confuse the befuddled public as to the true purpose in life, unless that's the direction in which your tastes jet. You'll have just as much fun, and a good deal more success if you stick closer to the more.

How to Make a Car Body with Autodesk 123D Make
This is a very easy way to make a body kit for your toy cars. this is NOT a permanent body kit that will always stick to your toy car - you can remove it - s.

Diy Rc Car Body Best Idea DIY
Step 6. Begin laying your fiberglass. Start off with just one sheet soaked in resin, and lay it across the outside of the mold. Use a roller to push out any air bubbles, and tuck the fiberglass sheet around the edges and contours of your body kit. Allow the single sheet of fiberglass to completely dry, then gently pull it off of the foam mold.

How to Make a Car Body with Autodesk 123D Make
Step 4. Sandblast the entire body of the vehicle to scour the surface as clean as possible prior to painting. Apply your desired paint (and primer if necessary) and let it dry. Finish detailing the car and add any logos, custom hand-painted designs or otherwise. Building custom cars is a hobby that has grown over the years into a worldwide.

Yes, the manual is the size of a phone book. Yes it takes hundred of hours. But assembling your
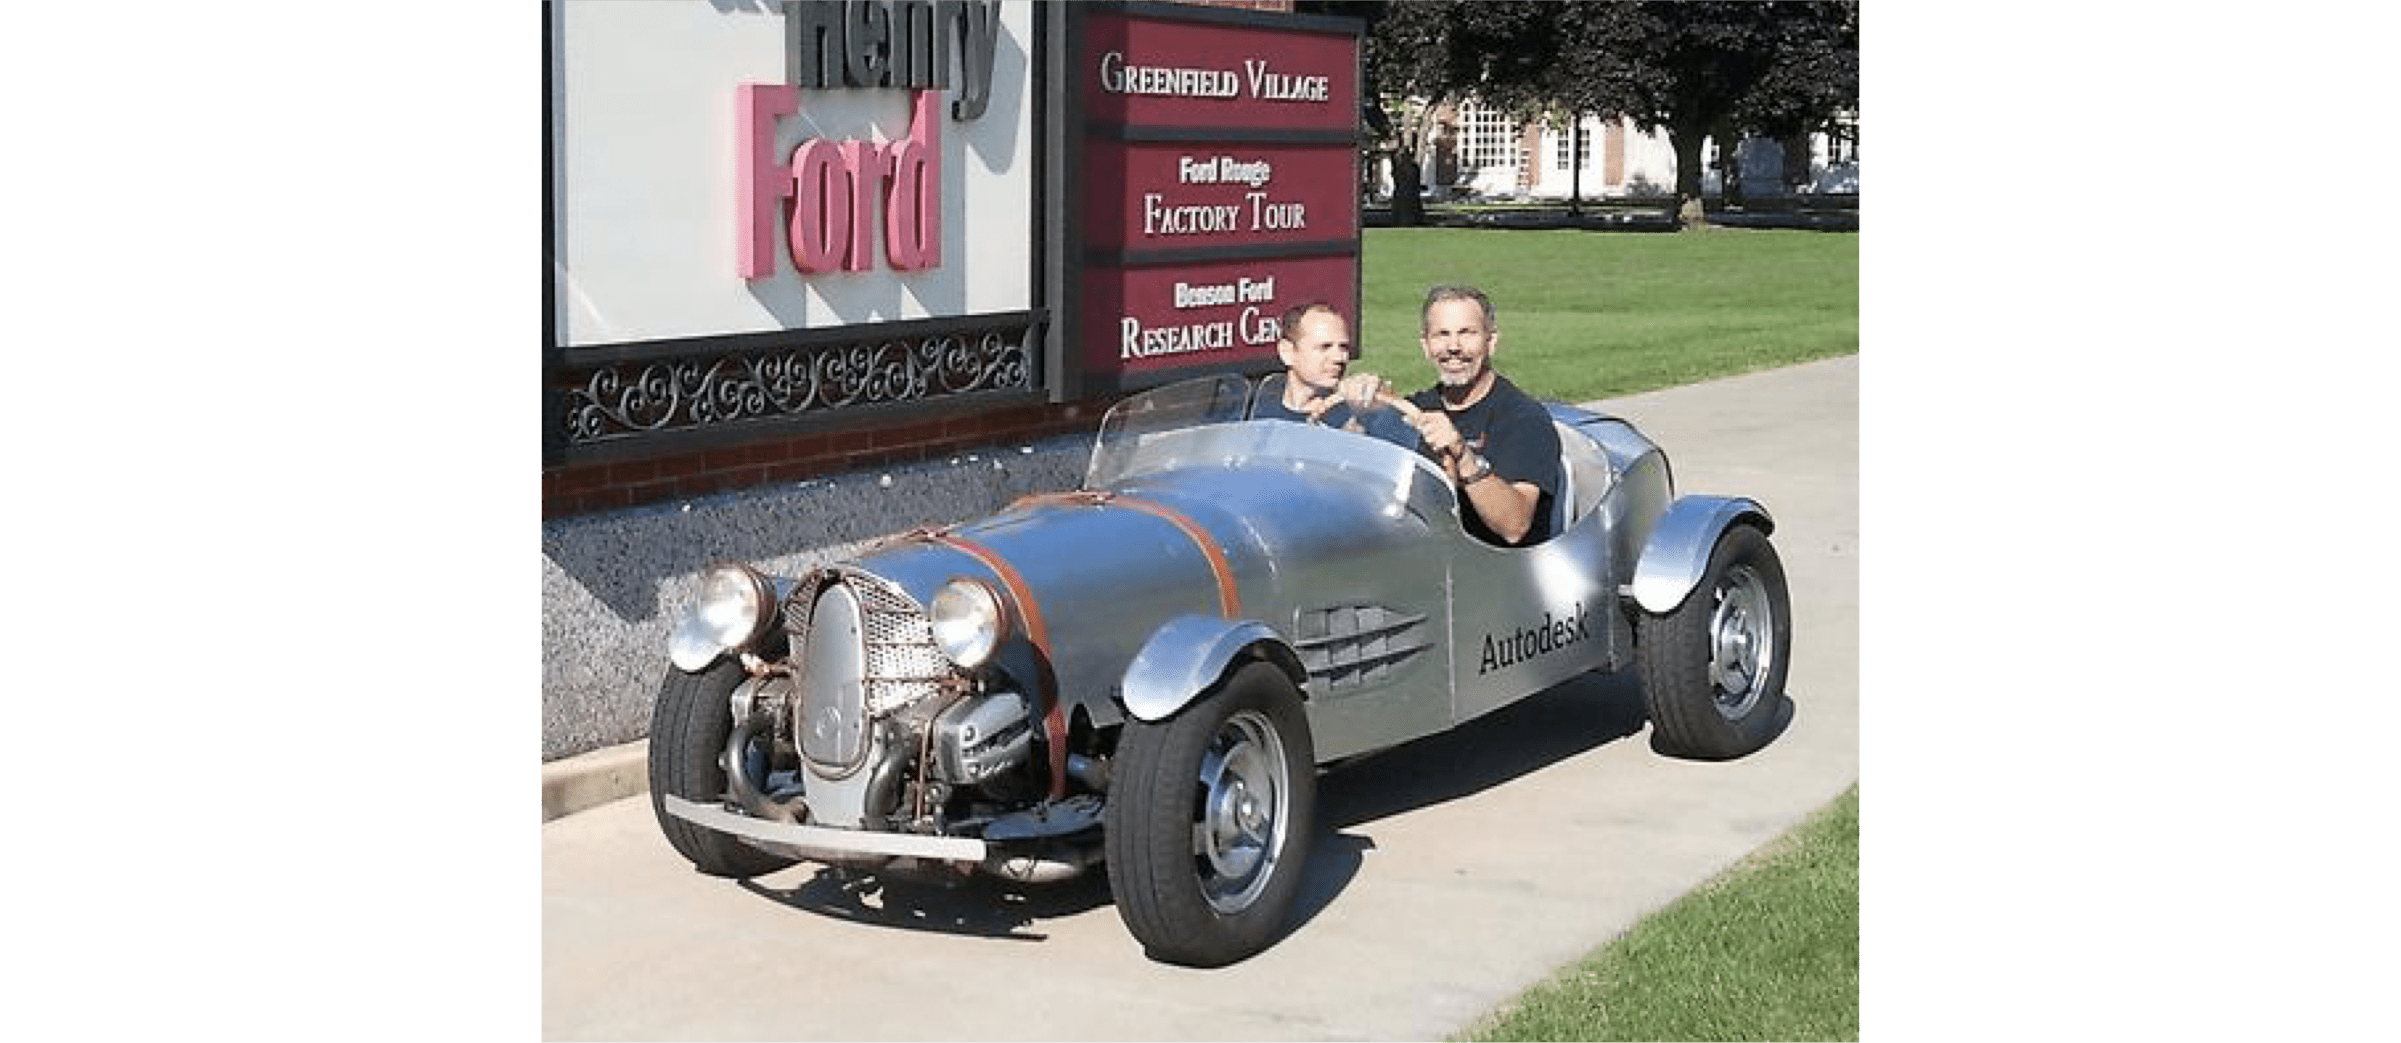
Bill demonstrates a new method he develops. Music: Technoaxe

How to Make a Car Body with Autodesk 123D Make
Step 1: 3D Wireframe Drawing From this 3D wireframe draw all the 2D parts for laser cutting. Step 2: Start from the first step : join the central longitudinal section (D) with the first two cross sections. Step 3: Add the inside longitudinal sections (B,C,E,F). Step 4: Add another cross section. Step 5: Add the outer longitudinal section A. Step 6:
How to make a car body 3D Warehouse
Step 1: Car Body Design The body of the car is the main shape of the project. The body will tell us where the axles and wheels will be positioned, and it will have the balloon connector on it, so we will begin here. Let's get started! Instructions Place a box on the workplane and size it to be 20mm wide, 60mm long, and 20mm tall.

Diy Auto Body Paint Stands
Text Guides How to Design Your Own Custom Body Kit Sometimes you can't get the car body you want, even with the growing selection of aftermarket parts. If you have the skills, you can design a DIY body model that will make your car truly unique. Instructions

fiberglass race car bodies Jettie Metzger
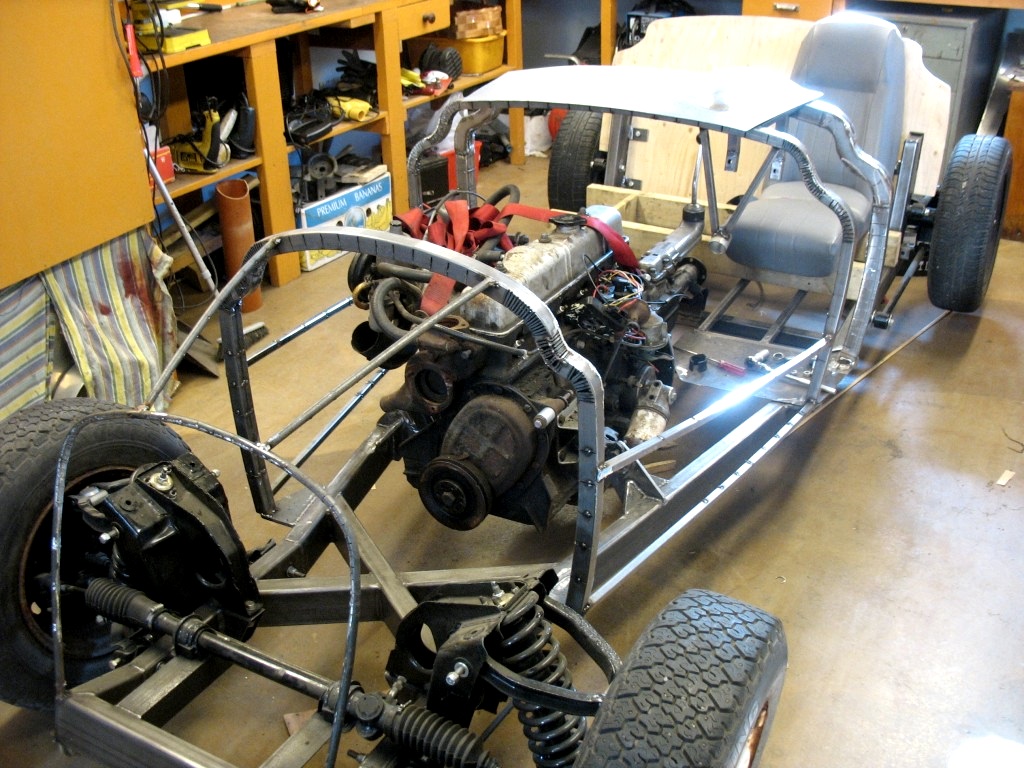
The remarkable point is how thin the wall thickness is on 1 inch square tubing. Take a saw and cut through the frame tube. Then cut through the body skin. Yep!! It's a lot thinner than body skin! In addition the way the tubes lay on top of each other provide a massively stronger connection than A fish mouth joint on round tube frames.

How to Make a Car Body with Autodesk 123D Make
1953. "How to Build a Fiberglass Car" by Doc Boyce Smith and Ted Kelly. Doc Boyce-Smith was founder of Victress in 1952. Ted Kelly was the President of Allied Product who supplied fiberglass and resin - and was the initial fiberglass supplier for Victress too. 1954 Book and 1959 and 1966.

How to Make a Car Body with Autodesk 123D Make
In this video we are getting into detail on how I am building a body kit by using parts off of other cars. We are extending FC side skirts and modifying a To.

How to Make a Car Body with Autodesk 123D Make
Setting up the base for creating the plug to be carved to the eventual body shape.Follow along for the entire process of creating a carbon body for my car, a.

How To Build A Custom Car Body INSPIRING BODYBUILDING
Use the sketching tools to create your car body. You will make your first sketch on the grid below the car and use the move tool to place it upright and in position. You can either Copy, Paste and Scale that sketch to make your other contours or you can drawn new sketches and move them into place.
Build Your Own Car
1 Select the proportions of the car based on car's main purpose. Draw the rough shape of the car using straight lines and right angles instead of curves. Then, divide this block-shaped car into 3 or 4 squares, with 1 on top and 2-3 on the bottom. Finally, change the size and location of the squares to reflect how the car is intended to be used. [1]
How to Make a Homemade Car A StepbyStep Guide to Building Your Own Vehicle The Enlightened
Step 3. Cover the foam with body filler and let it sit for two hours to dry. Sand the filler with 220-grit sandpaper to remove any undulations and bumps. Spray three coats of polyester primer directly on top of the body filler and follow the on label directions for drying time. Once dry, use 220-grit sandpaper to smooth the surface of the primer.